How to add payment details or Upgrade from Trial on Cloudusk
1 min read
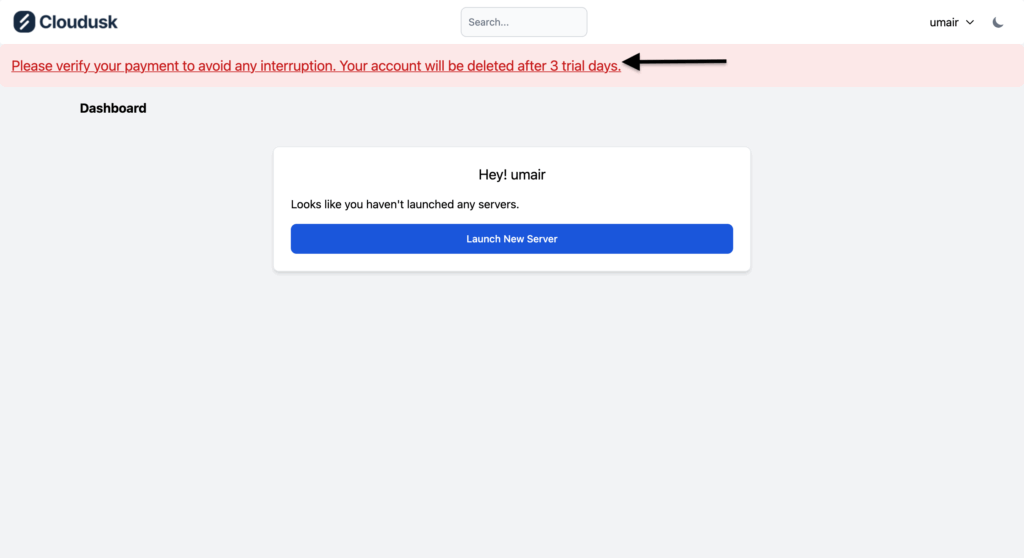
If you have created a new account with Cloudusk and verified it using email and phone, you are automatically subscribed to Trial plan which lasts for 3 days. You can create a server for free and test WordPress websites during the trial period. However, the trial period is only for 3 days, after that your server will be deleted if valid payment/billing details aren’t provided. Here is how to do that. There is a sticky banner at top of dashboard which shows a message to add payment details to avoid any service interruption. You have to click on banner or go the following link
It will take you to the payment page where you have to enter payment details for the choose payment method.
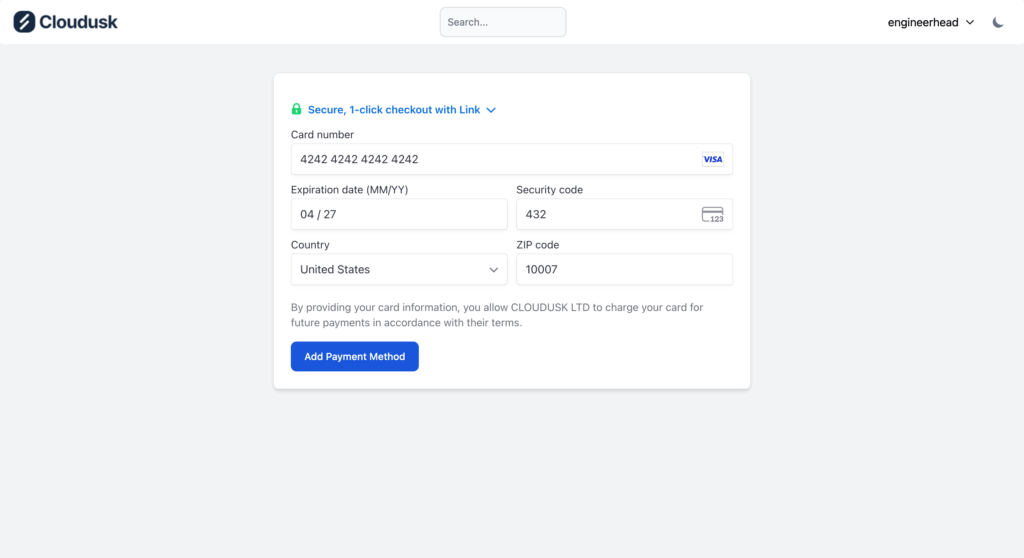
After entering the payment details, press Add payment method button. If the payment details are correct, a toast message will be displayed confirming that payment method was added successfully. After a while, you will be redirected to main dashboard page and the top banner asking for payment details will be gone.

To view your payment method or change it in future, you can go the following link or click profile at top right corner which will take you to the profile page where you can inspect your billing details by going to the billing section.
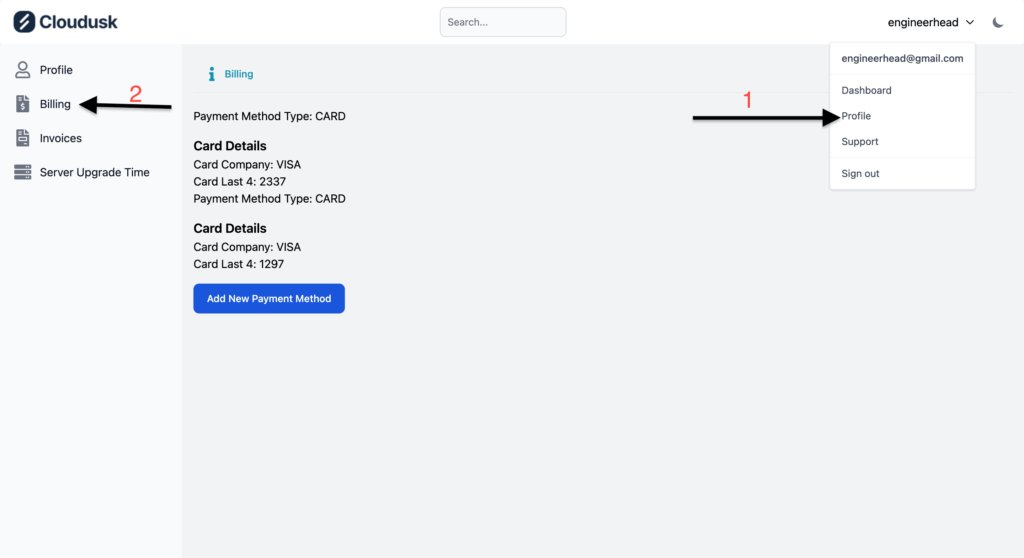
All the restrictions on your account will be lifted after adding payment details. You can freely create server for hosting WordPress site as described here.


